The CamTool enables to create custom Lua scripts over the image processing chain.
The CamTool also enables an option to execute individual scripts.
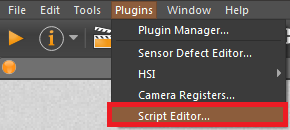
For extended camera control with a LUA script go to Plugins -> Script editor...
Here you may enter script in the following format:
local camera = cameras.Get()
local act_exposure = camera:GetParam(XI_PRM_EXPOSURE)
print(":Default exposure: " .. act_exposure)
camera:SetParam(XI_PRM_EXPOSURE, 5000)
act_exposure = camera:GetParam(XI_PRM_EXPOSURE)
print(":New exposure: " .. act_exposure)
camera:StartAcquisition()

for i=1,4 do
    app.WaitForNextFrame()
    app.SaveToFile("file" .. i .. ".tif")
    if i<4 then app.Wait(2) end
end
camera:StopAcquisition()
When this script is executed the exposure time is set to 10ms and the image acquisition is started. Some properties of the 10 acquired images will be printed.
--[[
When this script is executed the exposure time is set to 10ms and the image
acquisition is started. Some properties of the 10 acquired images will be
printed
--]]

-- Retrieve an object representing the camera
print("Opening first camera...")
local cam = cameras.Get()

-- Setting "exposure" parameter (10ms=10000us)
cam:SetParam(XI_PRM_EXPOSURE, 10000)

-- Start the image acquisition and show in view
local viewId = cam:StartAcquisition()

for i=0, 10 do
  -- Copy image from view
  app.WaitForNextFrame(1, viewId)
  local img = app.GetViewImage(viewId)

  -- Get first pixel and size of the image
  local pixel = img:GetPixelValue(1,1)
  local width = img:GetWidth()
  local height = img:GetHeight()
  print("Image "..i.." ("..width.."x"..height..") received from camera.")
  print("First pixel value: "..pixel)

end -- for 0 to 10

print("Stopping acquisition...")
cam:StopAcquisition()

print("Done")
Executing this script lets you record to an uncompressed video file called "test.avi" from the first camera for 10 seconds.
--[[
Executing this script lets you record to an uncompressed video file called
"test.avi" from the first camera for 10 seconds.
--]]

-- Retrieve an object representing the camera
print("Opening first cam...")
local cam = cameras.Get()

-- Start the image acquisition
local viewId = cam:StartAcquisition()

-- Start recording
app.RecordVideoToFile("test.avi", viewId)
print("Recording started")

-- Wait for 10 seconds while recording
app.Wait(10)

-- Stop recording and image acquisition
app.StopVideoRecording(viewId)
print("Recording stopped")
cam:StopAcquisition()
When this script is executed, 10 images are acquired from the first camera, a
line is drawn to each one of them and they are saved to a file.
--[[
When this script is executed, 10 images are acquired from the first camera, a
line is drawn to each one of them and they are saved to a file.
--]]

-- Retrieve an object representing the camera
local cam = cameras.Get()

-- Start the image acquisition and show in view
local viewId = cam:StartAcquisition()

for i=0, 10 do
  -- Copy image from view
  app.Wait(2)
  local img = app.GetViewImage(viewId)
  local width = img:GetWidth()
  local height = img:GetHeight()

  if (img:GetChannels() > 1) then
    img:DrawPixelLine(0,1,1,width,height,1) -- blue
    img:DrawPixelLine(122,1,1,width,height,2) -- green
    img:DrawPixelLine(255,1,1,width,height,3) -- red
  else
    img:DrawPixelLine(0,1,1,width,height)
  end -- if color

  app.NewViewWithImage(img)
  img:SaveToFile("line"..i..".jpg")

end -- for 0 to 10

cam:StopAcquisition()
This liveCapture.lua script will capture 10 frames in software trigger mode.
The delay will be 5 seconds - see app.wait.
--[[ This script will capture 10 frmanes in software trigger mode.
The delay will be 5 seconds - see app.wait ]]

local camera = cameras.Get()
local oldTrgSource = camera:GetParam(XI_PRM_TRG_SOURCE)
camera:SetParam(XI_PRM_TRG_SOURCE, XI_TRG_SOFTWARE)
camera:StartAcquisition()
for i=1,10 do
    camera:SetParam(XI_PRM_TRG_SOFTWARE, 1)
    app.WaitForNextFrame()
    app.SaveToFile("file" .. i .. ".tif")
    if i < 10 then app.Wait(5) end    -- wait 5 seconds, but not after last image
end
camera:StopAcquisition()
camera:SetParam(XI_PRM_TRG_SOURCE, oldTrgSource)
For hardware triggering the following modification should be added to the previous script according to this page:
camera:SetParam(XI_PRM_TRG_SOURCE, XI_TRG_EDGE_RISING)
camera:SetParam(XI_PRM_GPI_SELECTOR, 1)
camera:SetParam(XI_PRM_GPI_MODE, XI_GPI_TRIGGER)
It is also possible to initiate a time-lapse start-up script to CamTool:
--[[ Set this file as startup script in CamTool options
app.AddMenuItem("Time-lapse 10x5", "liveCapture.lua")
Following script acquires 500 frames from the camera and for each records timestamp and sensor board temperature.
At the end the graph with recorded data is displayed in CamTool as well as all data is copied to clipboard.
local cam = cameras.Get()
local viewId = cam:StartAcquisition()
local graph = graph.CreateNew()
local temp = graph:AddSeries()

for i=1, 500 do

  app.WaitForNextFrame(0.5, viewId)
  img1 = app.GetViewImage(viewId)
  timestamp = img1:GetTimeStamp()

  sens_board_temp = cam:GetParam(XI_PRM_SENSOR_BOARD_TEMP)
  graph:SeriesAddPoint(temp, timestamp, sens_board_temp)

end

img2 = image.CreateNew(1200, 800, 3, 8)
graph:DrawIntoImage(img2)
app.NewViewWithImage(img2,"Graph")  -- graph is displayed in new image
graph:CopySeriesDataToClipboard(temp) -- data is copied to clipboard when script finished
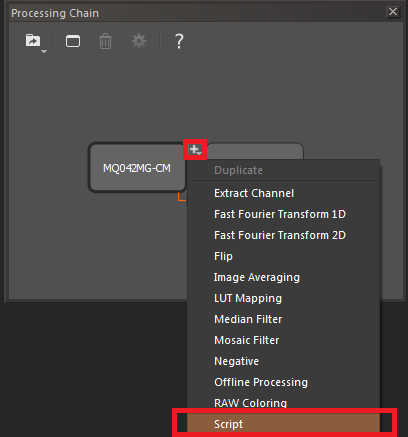
A script can be added via the Processing Chain tool window.
-- Draws cross in the middle of the image and rectangle around it
local w2 = img:GetWidth()/2
local h2 = img:GetHeight()/2
local size_x = w2/4
local size_y = h2/4
-- cross
local color = (2^img:GetBpc())-1  -- white
img:DrawPixelLine(color, w2 - size_x, h2, w2 + size_x, h2)
img:DrawPixelLine(color, w2 - size_x, h2+1, w2 + size_x, h2+1)
img:DrawPixelLine(color, w2 - size_x, h2-1, w2 + size_x, h2-1)
img:DrawPixelLine(color, w2, h2 - size_y, w2, h2 + size_y)
img:DrawPixelLine(color, w2+1, h2 - size_y, w2+1, h2 + size_y)
img:DrawPixelLine(color, w2-1, h2 - size_y, w2-1, h2 + size_y)
-- rectangle
color = 0
img:DrawPixelRect(color, w2 - size_x, h2 - size_y, w2 + size_x, h2 + size_y)
--[[
CamTool switches to fullscreen mode and starts the acquisition on all cameras.
It then switches through the views for all cameras showing each one for five seconds.
Finally a tiled view of all cameras is shown for five seconds.
After that CamTool switches back to window mode.
]]

-- Switch to fullscreen mode
app.SwitchFullScreen(true)

local cams = {}
local viewIds = {}
for i=1, cameras.GetCount() do
  cams[i] = cameras.Get(i)
  viewIds[i] = cams[i]:StartAcquisition()
end -- for cameras.GetCount()

-- Switch through all views
for i=1, cameras.GetCount() do
  app.ActivateView(viewIds[i]) --Switch to the next camera
  local camName = cams[i]:GetParam(XI_PRM_DEVICE_NAME)
  app.ShowNotification(camName)-- Show the name of the camera
  app.Wait(5) -- Wait for 5 seconds
end -- for cameras.GetCount()

-- Show all views side by side
app.TileViews()
app.ShowNotification("Tiled view")
app.Wait(5)

app.SwitchFullScreen(false)