This page describes how to develop custom plugins for XIMEA software - CamTool.
The plugins are implemented in the Qt framework.
To create a custom plugin, it is necessary to configure the development workspace.
This includes building the Qt, installing Qt Creator.
After this environment is prepared, the custom plugin may be built and added to the XIMEA CamTool.
The following instructions assume you are working on Windows.
If you are working with Linux, please have a look at the instructions for Linux.
There are 4 main components required to develop CamTool Plugins:
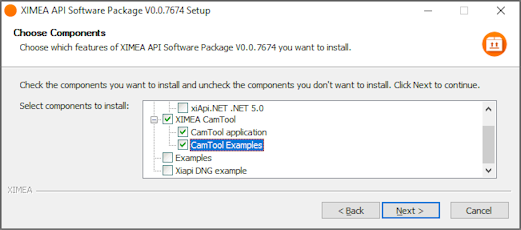
Check The CamTool Example when installing the XIMEA SP.
Get current used version of Qt in dialog shown by opening menu Help - About - About Qt (e.g. v6.4.3)
Qt Online Installer is much easier. You can find it on www.qt.io . You will have to create the Qt account, and probably conform to the LGPL license. For the plugin development, select only the appropriate choices inside the Qt Online Installer. It is not needed to install everything. You will need:
After this is done, you can skip to Plugin compilation step.
Build Qt from sources (official guide can be found here) - use the commit tagged as v6.4.3
C:\Qt\6.4.3_x64 C:\Qt\6.4.3_x64 (64bit cmd prompt)\
Note: Some modules don't need to be installed. They can be skipped by calling ./configure -skip <selected module> from the command line.
The Qt Creator IDE required for the CamTool plugin development can be downloaded here .
Next step is to install the Qt Creator.
C:\Qt\6.4.3_x64\qtbase\bin\qmake.exe .
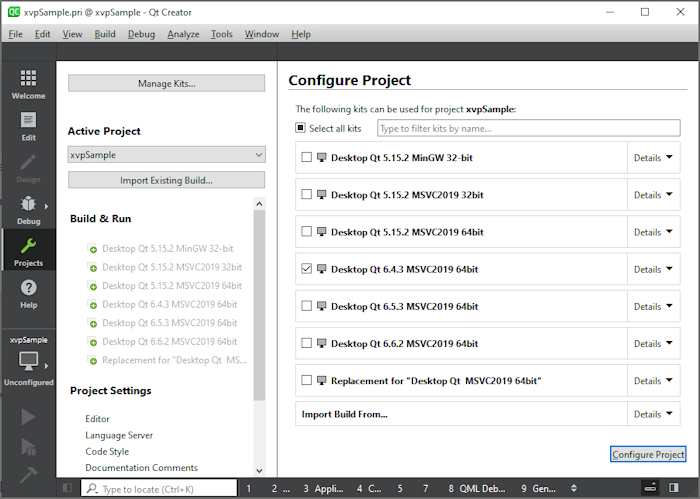
Open xvpSample.pro located in the C:\XIMEA\Examples\CamTool\xvpSample.
Select the desired project configuration (according to the image below) and click Configure Project.
Then select the xvpSample project and build it with the desired configuration.
You should compile the plugin in Release configuration. If you need to debug your plugin too, you will need the Debug version of CamTool. In that case, please contact the XIMEA support.
The built plugin is located in the C:\XIMEA\Examples\CamTool\xvpSample\bin directory as a xvpSample.dll. file.
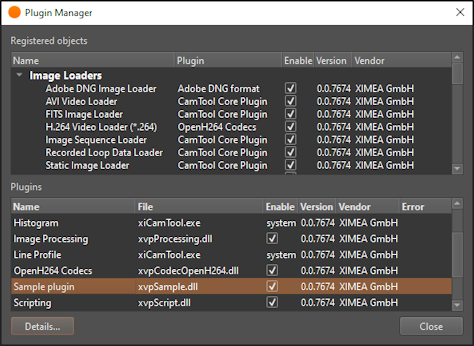
To install the plugin into Ximea CamTool, follow these steps:
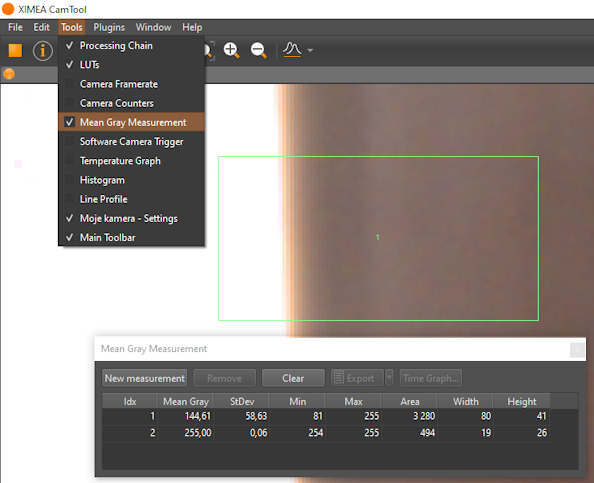
Users can draw rectangles into opened image views and the mean intensity is measured inside them.
Users can additionally resize the rectangles and the result is recalculated.
When on a live image from the camera, the result is calculated 4x per second (not to block the CPU for high frame rates).
The results are shown in the docked widget at the bottom of the screen (hidden as default).
The measurement table was designed in Qt Designer inside Qt Creator and is added to the application in CxPlugin::init.
The rectangles are added as CxVectorObjectRect to the image in mouse events relayed to the plugin in CxPlugin::viewMouseBtnPressEvent, CxPlugin::viewMouseMoveEvent and CxPlugin::viewMouseBtnReleaseEvent. The changes to the geometry are detected using CxVectorObjectRect::rectChanging signals called from CxVectorObjectRect instance.
When measuring the image, the image data is obtained using IxAppDelegate::viewCurrentImage.
To measure on live image, the data in CxPlugin::viewGotNewImage notification is used.
The results table stores the view ID and ID of the rectangle for each record to identify the object on the screen, to be able to update the results and delete the objects when the user wishes to.
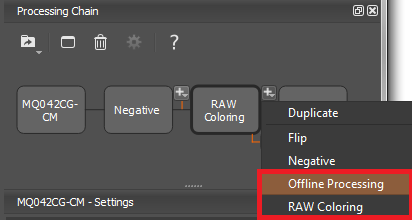
Simple in-place image processing.
It does not change the image format, so it returns the same SxPicBufInfo as on input in CxImageProvider::queryOutputImageInfo and as it is in place, it does not require any additional image buffers, so returns 0 in CxChainable::buffersCountInMemoryPool.
Another image processing object.
Works with images in RAW format, and sends RGB image as output. As it needs to allocate new image, it returns 1 in CxChainable::buffersCountInMemoryPool.