The following webpage describes the range of support for NVIDIA Jetson modules.
All of these excel in delivering high performance and power efficiency packed into a small size form.
They are ideal for use in deep learning, computer vision and other computing applications.
Below is a short description of each module:
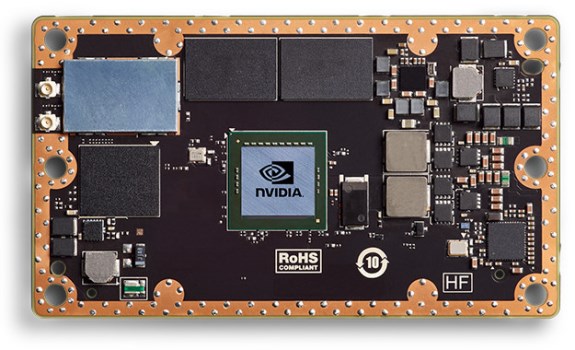
Jetson TX1 is an embedded module from Nvidia which includes quad-core 64 bit ARM CPU and 256-core Maxwell GPU.
Jetson TX2 is a successor to TX1, updating GPU architecture to Pascal and improving the performance.
Jetson TX2i is an industrial version of TX2 module, including ECC memory support.
Jetson Orin Nano sets a new standard for creating entry-level AI-powered robots, smart drones, and intelligent cameras.
Jetson Orin NX the world’s most powerful AI computer for autonomous power-efficient machines in the smallest NVIDIA Jetson™ form factor ever.
Jetson Orin AGX delivers up to 200 TOPS of AI performance with power configurable between 15W and 40W.
Follow the official quick start guide that can be found here:
TEGRA X1/TEGRA LINUX DRIVER PACKAGE MULTIMEDIA USER GUIDE
Make sure that you have lbzip2 package installed.
In case your host machine isn't running Ubuntu you should replace the flashing command with the following sequence:
sudo cp /etc/mke2fs.conf .
sudo sed -i 's/64bit,//g' mke2fs.conf
MKE2FS_CONFIG="$(pwd)"/mke2fs.conf sudo -E ./flash.sh ${BOARD} mmcblk0p1
where ${BOARD} is one of the following: jetson-tx1, jetson-tx2, jetson-tx2i or jetson-xavier.
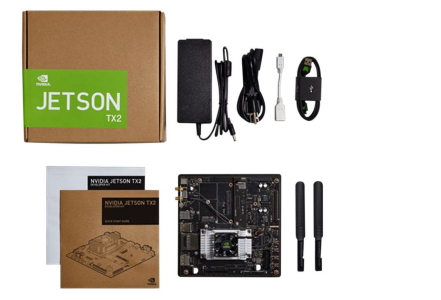
The official page for TX2 Devkit can be found here:
https://developer.nvidia.com/embedded/jetson-tx2-developer-kit
Results of USB3 and PCIe interface cameras connected to the module:
Jetson TX2 Benchmarks
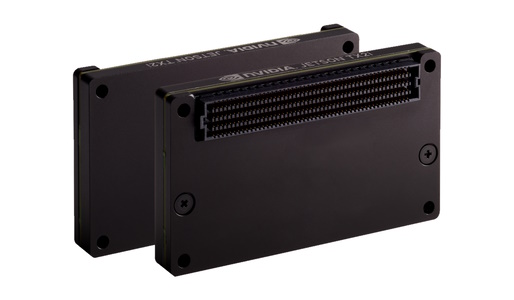
Jetson TX2 NX module initial test results with XIMEA camera models:
Jetson TX2 NX Benchmarks
Jetson TX2 vs AGX Xavier comparison,
Jetson Nano, TX2 and AGX Xavier comparison,
Jetson Image Processing,
Jetson Zero Copy for Embedded applications,
Realtime image processing on NVIDIA GeForce RTX 2080ti
Linux host is required for this procedure.
sudo -s can be used to gain privileges): tar --no-same-owner --no-same-permissions -xf Tegra186_Linux_R32.5.1_aarch64.tbz2 tar -xf TX2_xEC2_32.5.1.tar.bz2 #or TX2i_xEC2_32.5.1.tar.bz2 cd Linux_for_Tegra/rootfs/ tar --numeric-owner -xf ../../Tegra_Linux_Sample-Root-Filesystem_R32.5.1_aarch64.tbz2 cd ../ patch -p0 < ../ota-r32.5.1.patch echo ':aarch64:M::\x7fELF\x02\x01\x01\x00\x00\x00\x00\x00\x00\x00\x00\x00\x02\x00\xb7:\xff\xff\xff\xff\xff\xff\xff\xfc\xff\xff\xff\xff\xff\xff\xff\xff\xfe\xff\xff:/usr/bin/qemu-aarch64-static:' | sudo tee /proc/sys/fs/binfmt_misc/register > /dev/null ./apply_binaries.sh echo -1 | sudo tee /proc/sys/fs/binfmt_misc/aarch64 > /dev/null patch -p0 < ../oem_config-r32.5.1.patch #optional, needed for non-interactive OS setup cp /etc/mke2fs.conf . sed -i 's/64bit,//g' mke2fs.conf MKE2FS_CONFIG="$(pwd)"/mke2fs.conf ./flash.sh jetson-tx2 mmcblk0p1 #or jetson-tx2i rm bootloader/system.img.raw
nvidia account using nvidia password, either by connecting the keyboard, mouse and monitor directly to xEC2 or via SSH
When the board is connected to the host using a USB cable as described above, the network connection is automatically created and the board can be accessed at IP 192.168.55.1.
Alternatively, when using Ethernet (or Wi-Fi) connection you can use nmap utility to find the IP address of TX2 (assuming the host and TX2 are connected to the same physical segment of the network):
sudo nmap -sn -PR $(ip addr show | grep 'inet ' | grep -v 'scope host lo' | cut -f6 -d' ') | grep -B 2 Nvidia
Run the following commands on Jetson:
sudo apt update
sudo apt install ca-certificates
wget https://www.ximea.com/downloads/recent/XIMEA_Linux_ARM_SP.tgz
tar -xf XIMEA_Linux_ARM_SP.tgz
cd package
./install
sudo gpasswd -a "$(whoami)" plugdev
if [ -f /etc/rc.local ]
then
sudo sed -i '/^exit/ d' /etc/rc.local
else
echo '#!/bin/sh -e'                                            | sudo tee    /etc/rc.local > /dev/null
fi
echo 'echo 0 > /sys/module/usbcore/parameters/usbfs_memory_mb' | sudo tee -a /etc/rc.local > /dev/null
echo 'exit 0'                                                  | sudo tee -a /etc/rc.local > /dev/null
sudo chmod a+x /etc/rc.local
#enable controlling of memory frequency by user
echo 'KERNEL=="emc_freq_min", ACTION=="add", GROUP="plugdev", MODE="0660"' | sudo tee /etc/udev/rules.d/99-emc_freq.rules > /dev/null
#optional: allow user to use realtime priorities
sudo groupadd -fr realtime
echo '*         - rtprio   0' | sudo tee    /etc/security/limits.d/ximea.conf > /dev/null
echo '@realtime - rtprio  81' | sudo tee -a /etc/security/limits.d/ximea.conf > /dev/null
echo '*         - nice     0' | sudo tee -a /etc/security/limits.d/ximea.conf > /dev/null
echo '@realtime - nice   -16' | sudo tee -a /etc/security/limits.d/ximea.conf > /dev/null
sudo gpasswd -a "$(whoami)" realtime
#reboot
sudo reboot
On 64-bit version of Linux For Tegra (available since R24.1) it is possible to use PCIe cameras.
To enable support for PCIe in XIMEA API you need to run install script (see installation section) with -pcie flag:
./install -pcie
By default, the memory frequency is controlled by the kernel dynamically, which means that sufficient memory bandwidth isn't available at all times.
This causes crashes, hangs and lost frames when PCIe or USB3 cameras are used.
The solution is to raise the lower limit for memory frequency when image acquisition is running.
The following wrapper script can be used for that:
#!/bin/bash
# TX1:
# # cat /sys/kernel/debug/clock/emc/possible_rates
# 40800 68000 102000 204000 408000 665600 800000 1065600 1331200 1600000 (kHz)
# TX2:
# # cat /sys/kernel/debug/bpmp/debug/emc/possible_rates
# 40800 68000 102000 204000 408000 665600 800000 1062400 1331200 1600000 1866000 (kHz)
# Xavier:
# # cat /sys/kernel/debug/bpmp/debug/emc/possible_rates
# 204000 408000 665600 800000 1065600 1331200 1600000 1866000 2133000 (kHz)
EMC_FREQ=1600000
exec 3> /dev/emc_freq_min
printf '%x' "$EMC_FREQ" >&3
exec "$@"
Save it to ~/emc_wrapper.sh file and execute the following command:
chmod a+x ~/emc_wrapper.sh
To do a simple validation that everything is working you can run xiSample:
~/emc_wrapper.sh /opt/XIMEA/bin/xiSample
To view a live picture from a camera start CamTool:
~/emc_wrapper.sh /opt/XIMEA/bin/xiCamTool
Alternatively streamViewer application can be used, but you need to compile it first:
cd /opt/XIMEA/examples/streamViewer
sudo apt update
sudo apt install libgtk2.0-dev libgstreamer-plugins-base1.0-dev gstreamer1.0-x
sudo make GST10=1
sudo make install
Then you can start the viewer:
~/emc_wrapper.sh /opt/XIMEA/bin/streamViewer